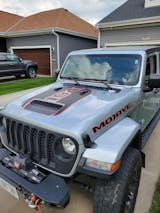
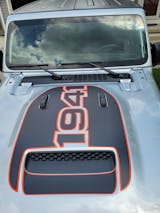
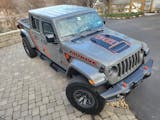
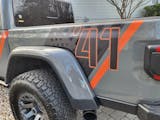
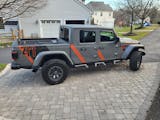
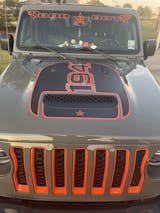
Top notch!! Brendan was instrumental in helping me transform the appearance of my Mojave from the ordinary into an eye-catching look that is uniquely mine. Except for the hood decal, all of the decals were custom modifications of existing decal designs from L&B's catalog. Brendan was not only very friendly and timely in response to custom requests (by both email and phone), but also very expeditious and detailed in getting the decals created and shipped out to me. I’m still toying with the idea of adding a little more, but what I have now is obviously making a good impression given the numerous compliments passed on from other Jeep enthusiasts.
My decals were installed less than 4 months ago so I can't speak to anything regarding long-term durability other than to say "so far so good"....no signs of adhesive loss, fading, or any other signs of degradation due to exposure to the elements.
Installation does require some patience and finesse especially if it's your first time (as was mine) and make sure you set aside plenty of time…this is not something you’d want to rush through because after they’ve fully dried is not the time to discover errors…there is no turning back and you’re stuck with them (no pun intended…lol!). All the decals I put on my Jeep took me a total combined time of about 18 to 20 manhours, but I tend to be very fussy with the finished detail.
If you are installing multiple decals, then starting with the smallest one first is your safest bet - having a smaller coverage area makes them less resistive to sliding thus less likely to tear when pulling on the edges to get the best placement/alignment. Be mindful that the decal’s’ adherence strength will rapidly sneak up on you such that it won’t slide smoothly when pulling on the edges and begin to skip across the surface in a rapid start and stop motion making it harder if not impossible to bring the decal into alignment. If that happens, then you can get it to slide again by gently peeling the decal up from the surface and spraying a generous amount of the soap solution under the decal.
I can’t emphasize enough how critical the soap solution is to the process and don’t worry about spraying too much. I recommend adding 4 drops of soap instead of just 2 because it slowed down the decal adherence timing allowing more time to get it slid into place.
The most time-consuming part of the whole process is purging out the smaller entrapped air and water bubbles. If the decal adherence becomes so tight that you can’t push the bubbles out, you can use a hypodermic needle or small sewing needle to poke a hole in the bubble, but gently to prevent the needle from digging into the Jeep’s clear-coat finish.
Generally speaking, it was a fun thing to do and pleased with the outcome. The installation process got faster for each decal from knowing what to expect and learning what techniques worked best for me.


